Game Where U Build Your Own Spaceship 2d
Three.js Tutorial: How to Build Your First Browser Game — Space Shooter
A step-by-step guide to developing your first ever game using the JavaScript library — Three.js
![]()
Hey! Today we'll be learning how to build browser games using Three.js! This will be an easy walk-through tutorial wherein we create the famous "Space Shooter" game (like this) with links to the source code after each step to make it easy for you to follow.
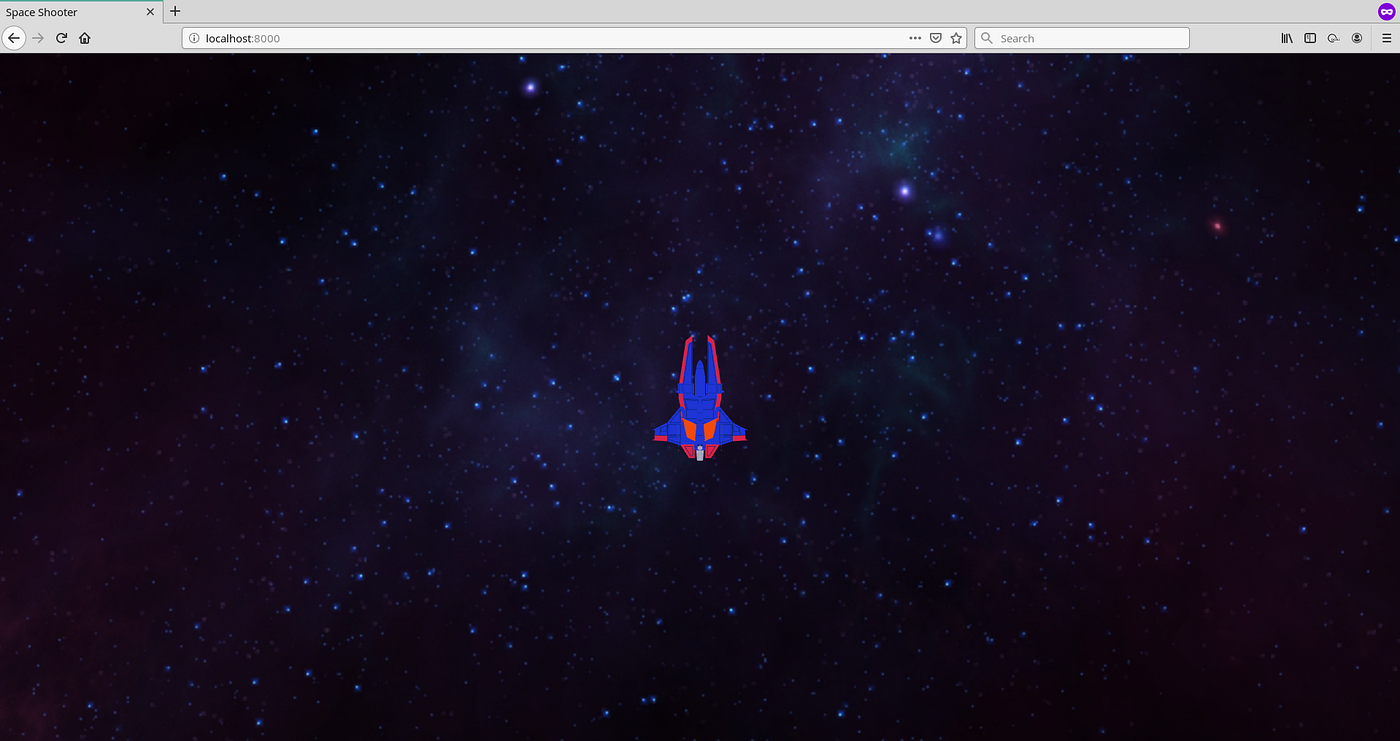
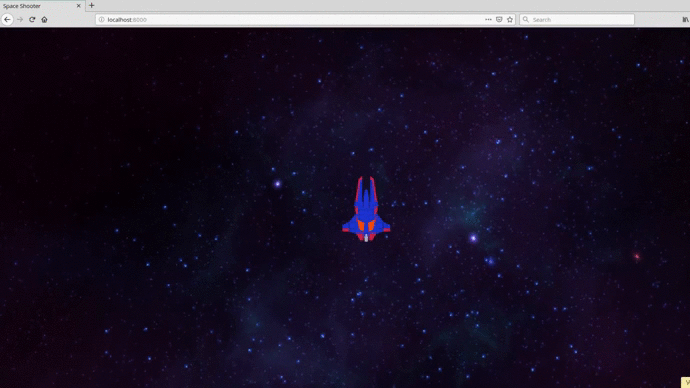
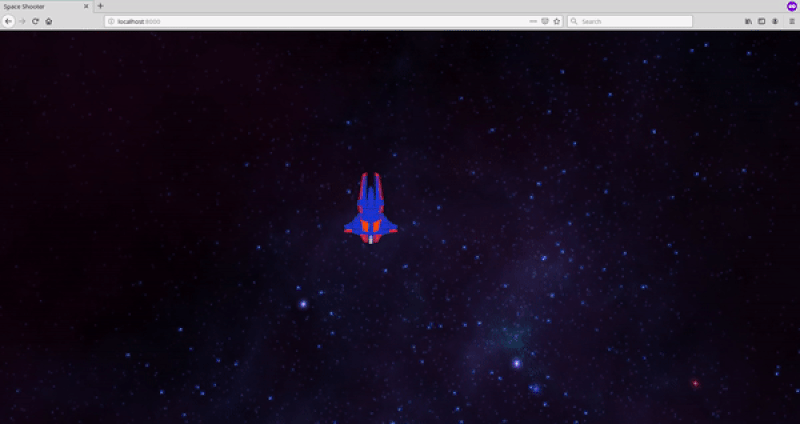
Oh, and by the way, this is how your game is going to look like: Space-Shooter
So are you excited about creating your own game!? Let's go then!

Three.js is a cross-browser JavaScript library and application programming interface that makes it very easy to create and display animated 3D graphics in a web browser using WebGL.
For this tutorial, I'll be assuming that you are familiar with the basics of Three.js, but if you're a total beginner, then I'd highly recommend first go through this beginner's guide and also this amazing series. Also, do check out the official docs of Three.js. These will come in handy when you're confused about some Three.js class/method ahead.
Step 1. Initialization
Let's begin by first organizing our directory structure and creating a boilerplate that would be helpful for your future Three.js projects.
The method we'll discuss is inspired by this article.
- First of all, let's create an
index.htmlfile. This will be the entry point of our webpage/game. It is basically a blank HTML page with a canvas element, and links the Three.js library and other js files. Whenever we create a new js file, we'll come back toindex.htmland link it here. - Next, we create
main.js, which is the entry point to the JavaScript side of the application and has access to the DOM and contains SceneManager. - And finally, we create
SceneManager.jswhich is responsible for handling the Three.js side of the app, which is completely hidden from the main. It knows nothing about the DOM and creates the Scene, Renderer, and Ortho-Camera. Yes, we'll be using an Ortho-Camera since this would be a 2D game.
This initialization would be the same for all your Three.js projects. So you can just head over to this boilerplate, clone it, and start working.
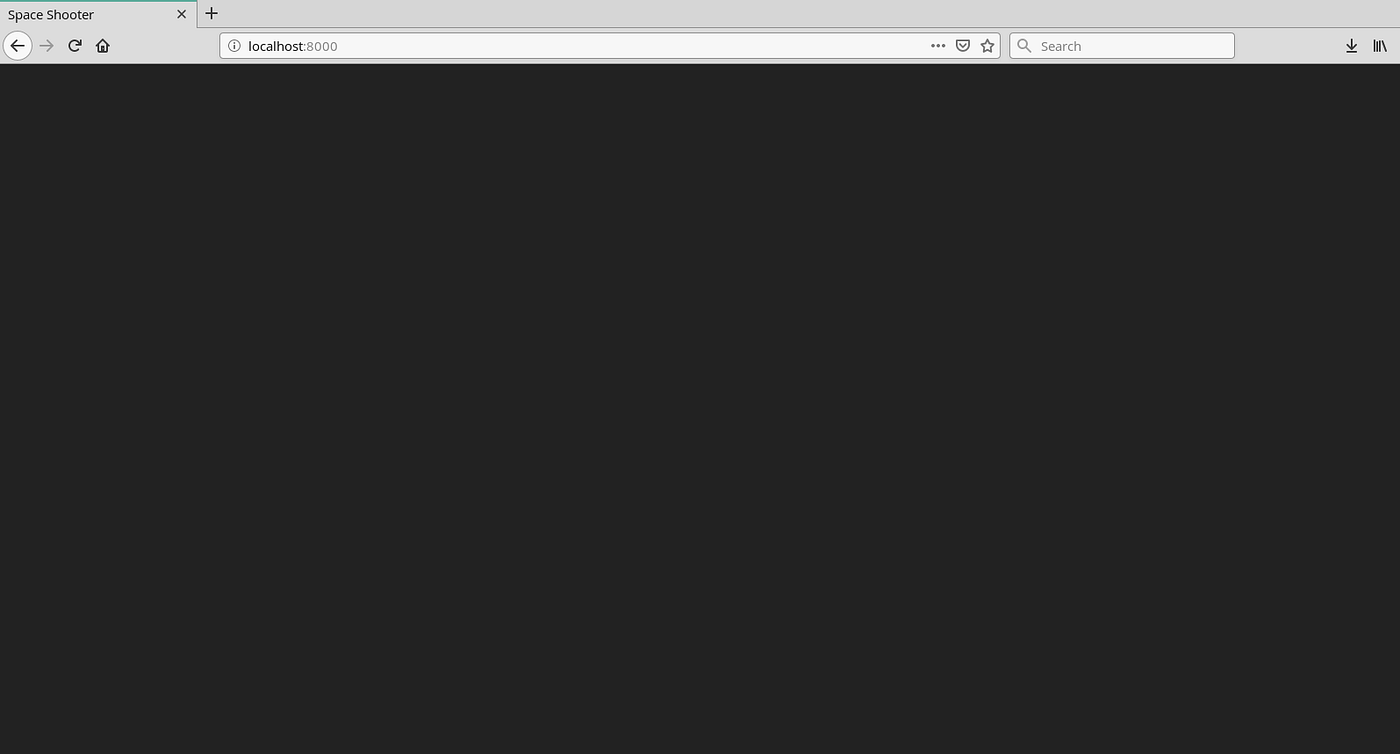
In order to test our application, we'll run python3 -m http.server and head over to localhost:8000 in the browser.
You should see a black screen(like below) and that's a good start!
Source Code after Step 1: Link
Step 2. Adding Scene Subjects
We'll now be adding objects to our game. To begin with, let's add a decent background and our Spaceship to the game.
- Let's create the file
Background.jsand create a Plane(that will act as our background) and add texture(image) to it. We'll position our plane such that it's lower-end touches the bottom of our browser window and therefore we'll translate it along the y-axis by(3000-window.height)/2.
- Next for Spaceship, we'll download a free 3D model from the internet (sketchfab, cgtrader, etc.) and store it inside
assets/. InsideSpaceship.jswe'll load the model, add texture to it and store its dimensions. For loading models, we'll have to link the Loader for our model extension separately inindex.html( I'm linking OBJLoader for my.objmodel)
<script src="https://unpkg.com/three@0.87.0/examples/js/loaders/OBJLoader.js"> </script> Here's a snippet of Spaceship.js. Note that we also have an update method here which will be called every frame.
- Inside
SceneManager.js, we'll create a new methodcreateSceneSubjectsthat initializes our objects (background and spaceship). We'll also maintain an array of dynamic subjects (those needed to be updated every frame).
          function createSceneSubjects(scene) {
            theBackground = new Background(scene);
            theSpaceship  = new Spaceship(scene);                      dynamicSubjects.push(theSpaceship);
}
Remember to link the new .js files inside index.html. And on reloading the browser, our game looks like this. Yippee, our spaceship's here!
Source Code after Step 2: Link
Step 3. Moving our Scene
We'll now be moving our scene, and therefore move the camera and the spaceship upwards with a constant speed(till the background lasts).
- Inside the update function of
Spaceship.js, we translate our spaceship along the y-axis with constant speed.
          this.update = function() {
            if (this.model)
            this.model.position.y += 1;
} - Similarly, we translate the camera along the y-axis with the same constant speed. We'll also call the update method of the dynamicSubjects every frame. This is how the update method of
SceneManager.jslooks like:
          this.update = function() {
            if (camera.position.y < 2000) {
            camera.position.y += 1;
            for(let i=0; i<dynamicSubjects.length; i++)
            dynamicSubjects[i].update();
            }
            renderer.render(scene, camera);
}
Great! On reloading, our scene is moving. 🎆 🎆
Source Code after Step 3: Link
Step 4. Controlling our Spaceship
The foundation of the game is set but we'd now want to ride on our spaceship and move through space! It's time to handle input.
- Inside
main.js, we'll add event listeners forwindow.onkeydownandwindow.onkeyupand call thehandleInputmethod of SceneManager.
          function bindEventListeners() {
            window.onkeydown = handleKeyDown;
            window.onkeyup = handleKeyUp;
}          function handleKeyDown(event) {
            var keyCode = event.which;
            sceneManager.handleInput(keyCode, true);
}
function handleKeyUp(event) {
            var keyCode = event.which;
            sceneManager.handleInput(keyCode, false);
}
- Inside
SceneManager.js, we'll maintain a keyMap that stores status of each key(true if pressed else false) which would be sent to our spaceship'shandleInputmethod in update. We'll be updating the keyMap in SceneManager'shandleInputmethod.
          this.update = function() {
            ...
            theSpaceship.handleInput(keyMap);
            ...
}
this.handleInput = function(keyCode, isDown) {
            keyMap[keyCode] = isDown;
} - Finally, we'll map the keys W, S, A, D to translate the spaceship in the corresponding direction while making sure that it doesn't go out of bounds.
          this.handleInput = function(keyMap, camera) {                  if (keyMap[87] && (this.model.position.y + this.height/2 < camera.position.y + camera.top)) {
              this.model.position.y += 5;
              }
              if (keyMap[83] && (this.model.position.y - this.height/2 > camera.position.y + camera.bottom)) {
              this.model.position.y -= 5;
              }
              if (keyMap[68] && (this.model.position.x + this.width/2 < camera.right)) {
              this.model.position.x += 5;
              }
              if (keyMap[65] && (this.model.position.x - this.width/2 > camera.left)) {
              this.model.position.x -= 5;
              }
}
On reloading the webpage, you'll be able to move the spaceship around!🚀 🎆
Source Code after Step 4: Link
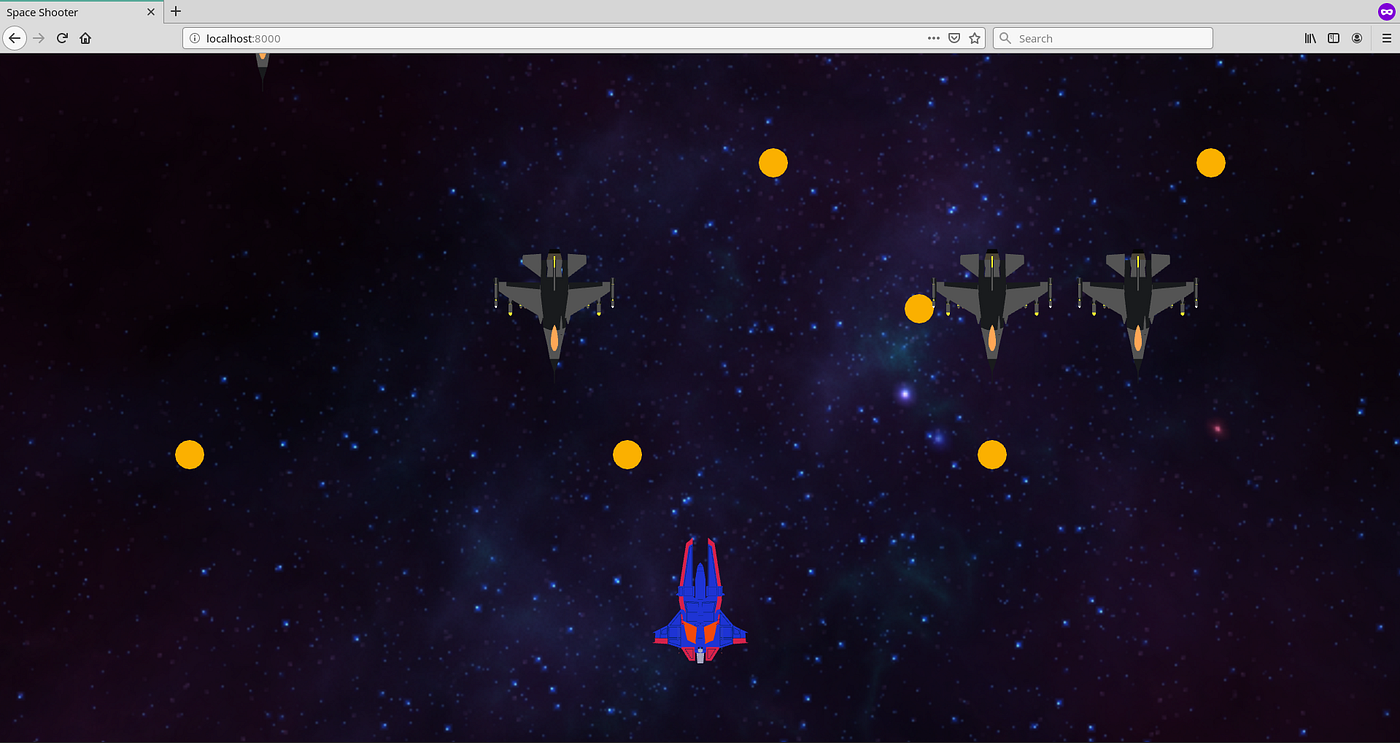
Step 5. Adding Coins and Enemies
Let's make our game more fun by adding coins and enemies.
- Create a new component in
Coin.jswhere create a sphere, color it golden, position it and store its height/width.
- Now create a function
placeCoinsto randomly spread the coins all over the background plane and call this function insidecreateSceneSubjectsmethod of SceneManager. - Similarly, you may add the enemies and place them randomly. I've used
.gltfmodel for enemy object and therefore linked GLTFLoader inindex.html. Also, don't forget to link the new JavaScript files.
Our game looks exciting now. But how do we fight against the enemies?
Source Code after Step 5: Link
Step 6. Shooting Missiles
We'll now allow our spaceship to shoot missiles at our enemies. Again, we'll just create a Missile component and initialize it whenever the SPACE key is pressed and give it a constant speed.
- So create a Missile component similar to the enemy above. Then, in the update method of SceneManager, we'll handle Space input and store our missiles in an array:
          this.update = function() {
            ...
            if (keyMap[32]) {
            var x = theSpaceship.model.position.x;
            var y = theSpaceship.model.position.y + theSpaceship.height/2;                      const m = new Missile(scene, x, y);                      dynamicSubjects.push(m);
            theMissiles.push(m);
            keyMap[32] = false;
            }
            ...
}
Whoa! We can finally shoot our enemies, but wait... why aren't our enemies getting destroyed?
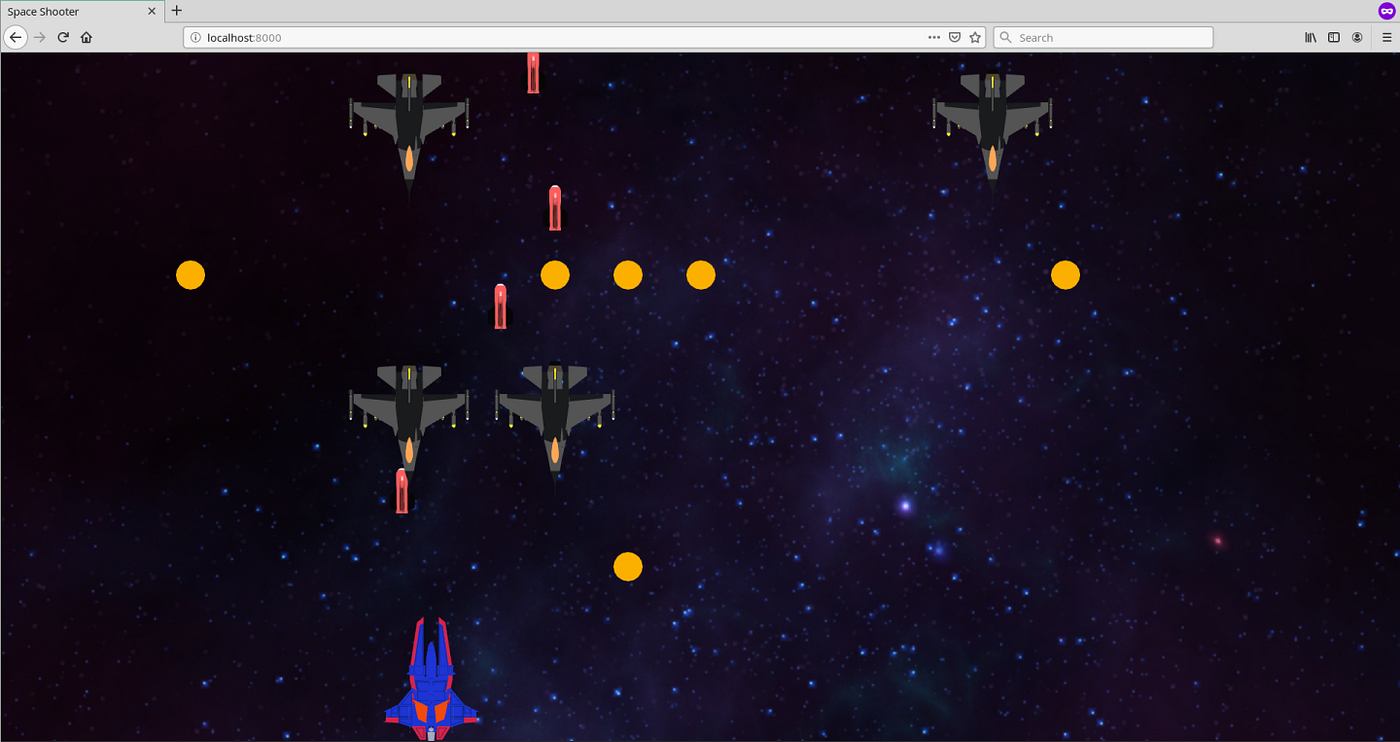
Source Code after Step 6: Link
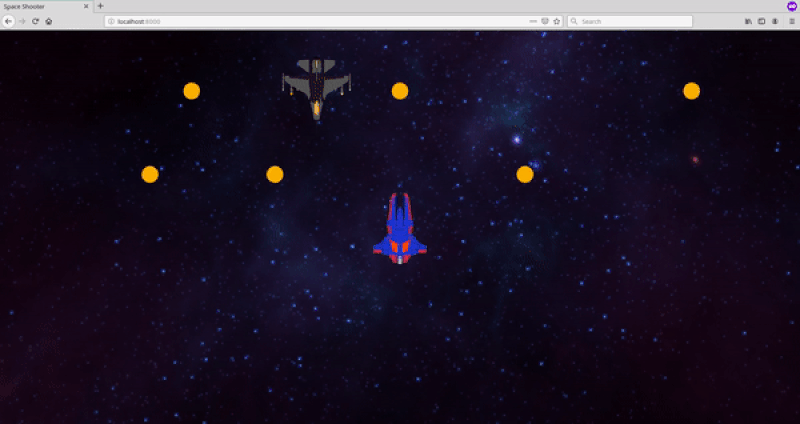
Step 7. Collision Detection
We need to add Collision detection to our game, so that our spaceship collects coins, our missiles kill the opps and spaceship's health decreases on colliding with the enemies. So we look for intersection between these models: (a) spaceship & all coins, (b) spaceship & all enemies, and (c) all missiles & all enemies.
- We need to check for collision in every frame, and so let's create a function
checkCollsionsand call it in the update method. TheisCollisionfunction below would determine intersection between two models using their positions and dimensions.
And now when we reload, our game feels incredibly awesome!
Source Code after Step 7: Link
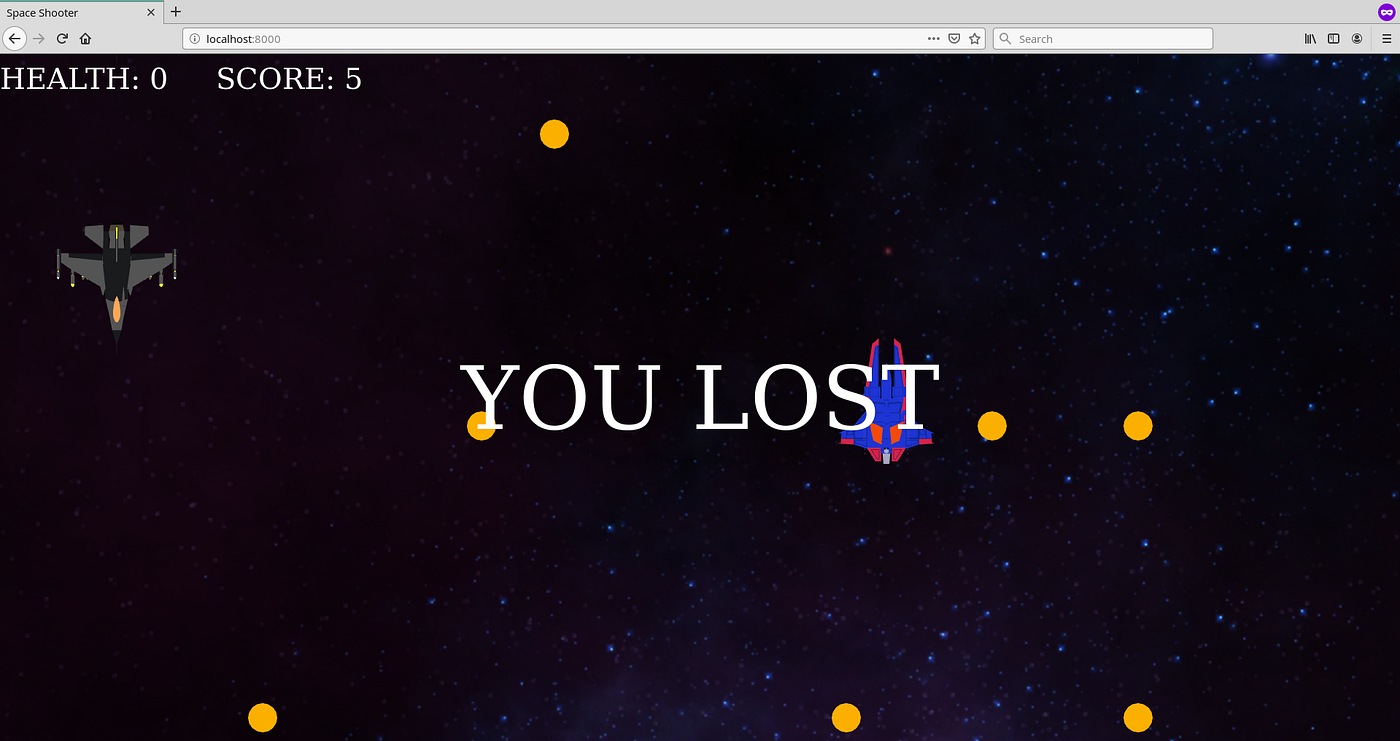
Step 8. Adding Scoreboard
Finally, we'll add a scoreboard at the top of our game using basic HTML.
- We'll simply add 2 divs inside
index.html: one for the scoreboard and the other to display 'Game Over' or 'You Lost' and give them proper styling.
<div id="scoreboard">HEALTH: 3   SCORE: 0</div>
<div id="gameover"></div> <style type="text/css">
#scoreboard {
position: absolute;
top: 10px;
width: 100%;
z-index: 100;
font-size: 40px;
color: white;
display:block;
} #gameover {
z-index: 100;
color: white;
font-size: 120px;
position: fixed;
top: 50%;
left: 50%;
transform: translate(-50%, -50%);
}
</style>
- After every collision , we update our variables score and health and update the scoreboard div. When the health of our spaceship falls to 0, we display — You Lost and when the camera reaches the end of our background, we'll display — Game Over.
That's it! Our game is finally done and looks like so much fun!
Source Code after Step 8: Link
Game Where U Build Your Own Spaceship 2d
Source: https://javascript.plainenglish.io/three-js-tutorial-to-build-your-first-browser-game-ae34bb0d351d
Publicar un comentario for "Game Where U Build Your Own Spaceship 2d"